Actually, there’s no single standard way in digital drawing, so we need not a tutorial to limit our minds. In addition, I’m not a master who can write a great tutorial, and my approach is very simple, just outline-fills-dodge, burn and done, so it seems there’s nothing I can talk. However, I still find there’re many enthusiasts still wandering outside the door, confused because they could not find the right way. The purpose of this post is just to stimulate more ideas from others. I hope there’ll be more better works showing up.
Personally, Photoshop is my favorite when I draw stuff. Some experts like using Illustrator for its vector feature, yet my style is more realistic and I always want to add some textures onto my works so vector drawing is just not my cup of tea. Aside, the biggest size of current icons is 512 x 512 pixel, so in my opinion the vector feature is not very necessary. (Here’s a great post: Icon Design: Bitmap vs Vector)
To be honest, icon drawing is more simple than other digital drawings because:
- 512 x 512 pixel is the terminal size.
- There’s only ONE project in most icons (1 or 2 accessories at most).
- Simple perspective. Only 2 ways: front view or 45° oblique view.
However there’re still some points should be aware of:
- The perspective MUST be accurate. It would be disgusting if you failed!
- The icon should be refined and elegant.
- Transparent edges. It must fit any background color.
- It’s important to analyse the light source (put it on the ground or desk).
Maybe there’re something more should be mentioned but I just have these 4 points in mind.
Whatever, let’s see the completed work here:
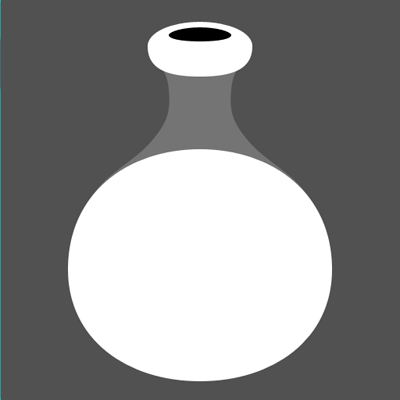
Firstly, let’s draw the outline of the object (in this case, the jar) with the pen tool:

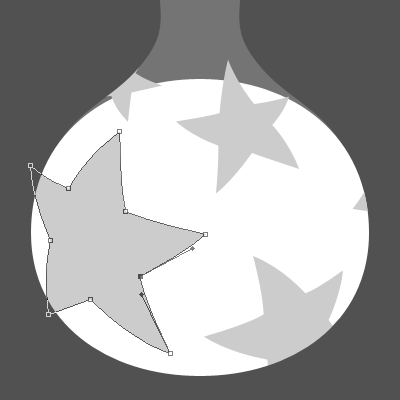
Right, the pen tool. You should use pen tool to draw any shapes (not the lasso tool) because the paths drawn by pen tool are vector so you can change it freely as you want. Try more times to adjust each key-point when you outlining.

Notice that I used mask to cover up the stars, they are all drawn out actually. If you are lazy and just draw the appearing part, it’ll be troublesome when you want to change the position.
Now color it. Needn’t be too serious here, we can adjust its Hue/Saturation later.

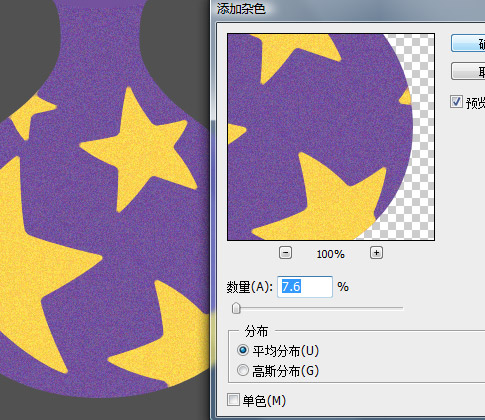
Rasterize the shapes and merge them into one layer (except the lip). Using Filter-Noise-Dust & Scratches to soft the angles of the stars (like colored glaze).

Give it some noise to simulate the texture. Filter-Noise-Add Noise.

Now we could make it 3-dimensional. It’s not magic but just shading chiaroscuro. DO NOT use Layer-Layer Style-Bevel and Emboss, it’s stupid. Just darken it. Use lasso tool to select the part you want to darken, feather it to 15 pixel, then use Image-Adjust-Curves. Remember, you could repeat this action, darken it a little each time, it will be more balanced.

Following is the hard work. Use dodge&burn tool to go into the details. In general, if you want it darker, burn it, if you want it lighter, dodge it. You can also dodge it to correct back if you feel somewhere is too dark. This endless progress will give you a canvas-painting-like result which be around between reality and art.

Well, it looks fine, but not great. How about this?

I think you can figure it out. Give prominence to the highlight, make the colored glaze stars stand out, and add shadows. Now the highlight and glaze stars first:

Be aware of that we can’t burn more on the high-saturation-yellow stars, so I just gave all of them a gradient from dark to transparent. To make the colored glaze stars stand out, I gave all the stars a layer style which includes inner glow (white) and outer glow (dark). This can make the stars blend into the jar body.
Then the lip of the jar. Firstly draw the highlight, then draw the lip. It’s just a simple ellipse, use some gradient. As for the shade of the lip, shape it then Image-Adjust-Curves on the body of the jar, it will be OK.

Then the shade of the whole jar. 3 ellipses, use some gradient. Using only 1 ellipse as shade is not very professional.

Well it’s finished. Someone like the aqua-style of Apple, it’s easy to accomplish, just add two reflections. TWO reflections, man, don’t forget the ground reflection.

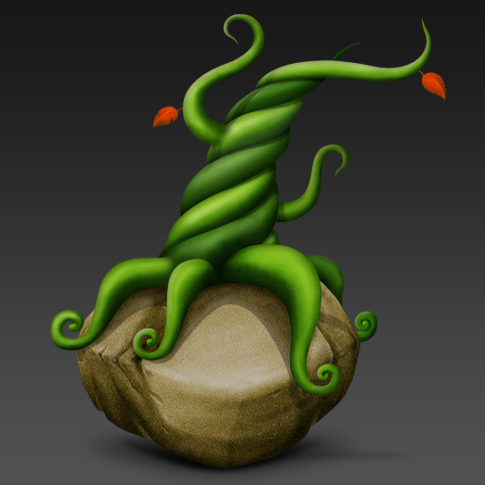
To conclude, icon drawing is actually not very difficult, it’s just hard labor – shapes and shades. Shape means the pen tool, shades mean curves-adjusting and the dodge&burn tool. For another instance, pay attention to the rock and vine part of another icon I drew:

